The weather in the Dardanelles – the strait that ran through Constantinople, connecting the Mediterranean and the Black Sea – was rough. Cloudy skies and choppy seas lashed against the Ottoman forts that dotted the coastline. Emerging from the gray horizon, the HMS Queen Elizabeth, one of the most modern battleship of the era, let loose a volley from her deck guns, beginning a long-distance bombardment. Behind her sat a large joint Anglo-French fleet of mostly older battleships. This was no pin-prick attack. The fight to clear the Dardanelles and force the Ottoman Empire out of the war had begun.
It would end less than a year later, and in humiliating defeat for the Entente.
—

A Beach Too Far – 568,000 Allied troops crammed into the narrow beachheads along the Bosphorus
No one expected the Ottomans to put up a fight.
“The Sick Man of Europe” had been in steady decline for centuries and had been sent back reeling in recent decades. The Italians had easily taken Libya from them. The Balkan Wars had reduced the Ottoman presence on mainland Europe to little but Constantinople. And that was only the past four years. While the numerous revolutions and coups of the early 20th Century saw the Ottomans slowly attempt to reform their government and military, few in Europe saw the Empire as an ally to desire or an enemy to fear.
The Empire’s true value were the Straits themselves. The historic demarcation between “East” and “West”, the Dardanelles were the only clear shipping lane linking Russia to her Western Allies. The White Sea in the north was frequently blocked by ice and the Baltic Sea bordered against the German Fleet. For that reason alone, the British attempted to bribe the Ottomans into the Entente. Even as that futile effort failed, and the Ottomans cast their lot with the Central Powers, attacking the Turks seemed a low priority amid the carnage of the Marne and Flanders on the Western Front. Defeating Germany was how the war would end. The Ottomans could wait.

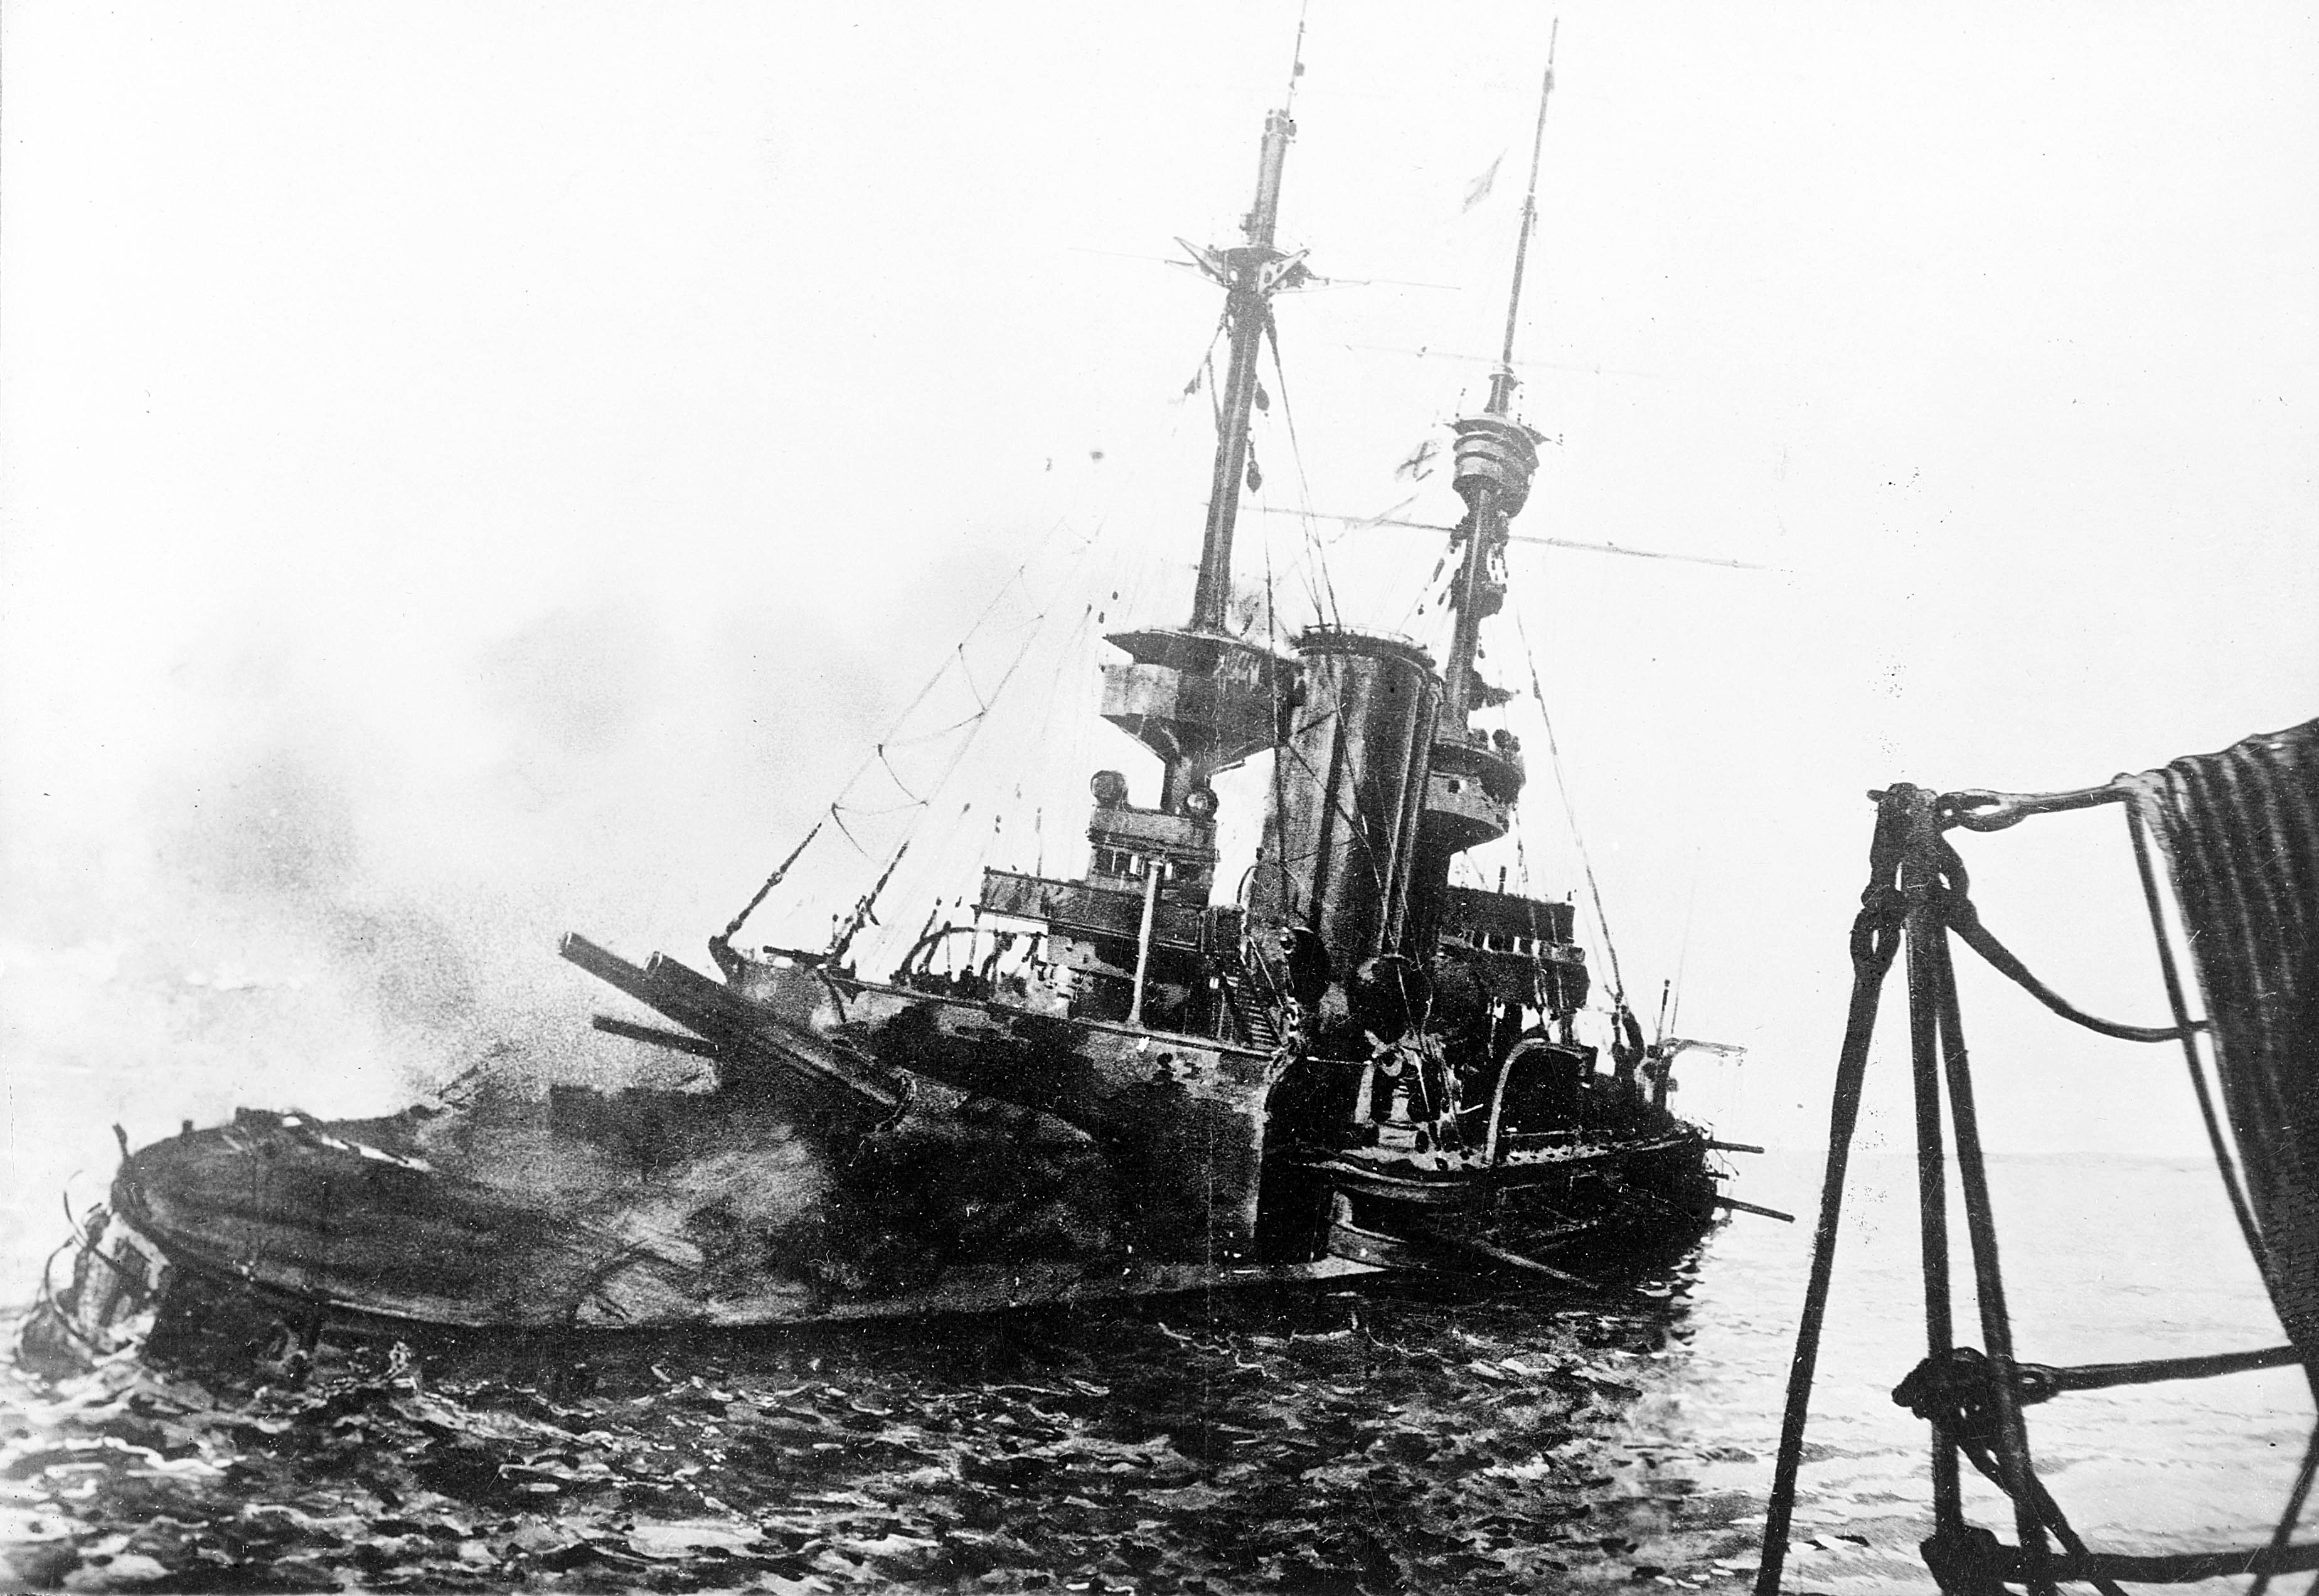
The HMS Irresistible sinks – the Allies had hoped to seize Constantinople through naval power alone, but the Dardanelles proved a tougher nut to crack and the British lost 4 warships in the process
The Turks would not be as patient. The Ottoman offensive in the Caucasus and a raid against the Suez Canal accelerated the Allied timetable. It mattered little that both Ottoman operations eventually failed (we’ve covered the Caucasus campaign; Suez left only 130 killed or wounded Brits to 1,500 Ottoman casualties). The Ottoman incursions coupled with Russia’s mounting losses on the Eastern Front demanded some sort of Allied response.
In the office of the First Lord of the Admiralty in London, a plan to force the straits – and the Ottomans out of the war – was starting to form. Winston Churchill, the First Lord, had seen an amazing rise to prominence within the Navy, taking the Admiralty position at only 37 years of age in 1911. Confident to the point of cocky, Churchill believed the Navy could sail all the way to Constantinople, and then supported by a small number of troops, capture the Turkish capital and thus end the war.

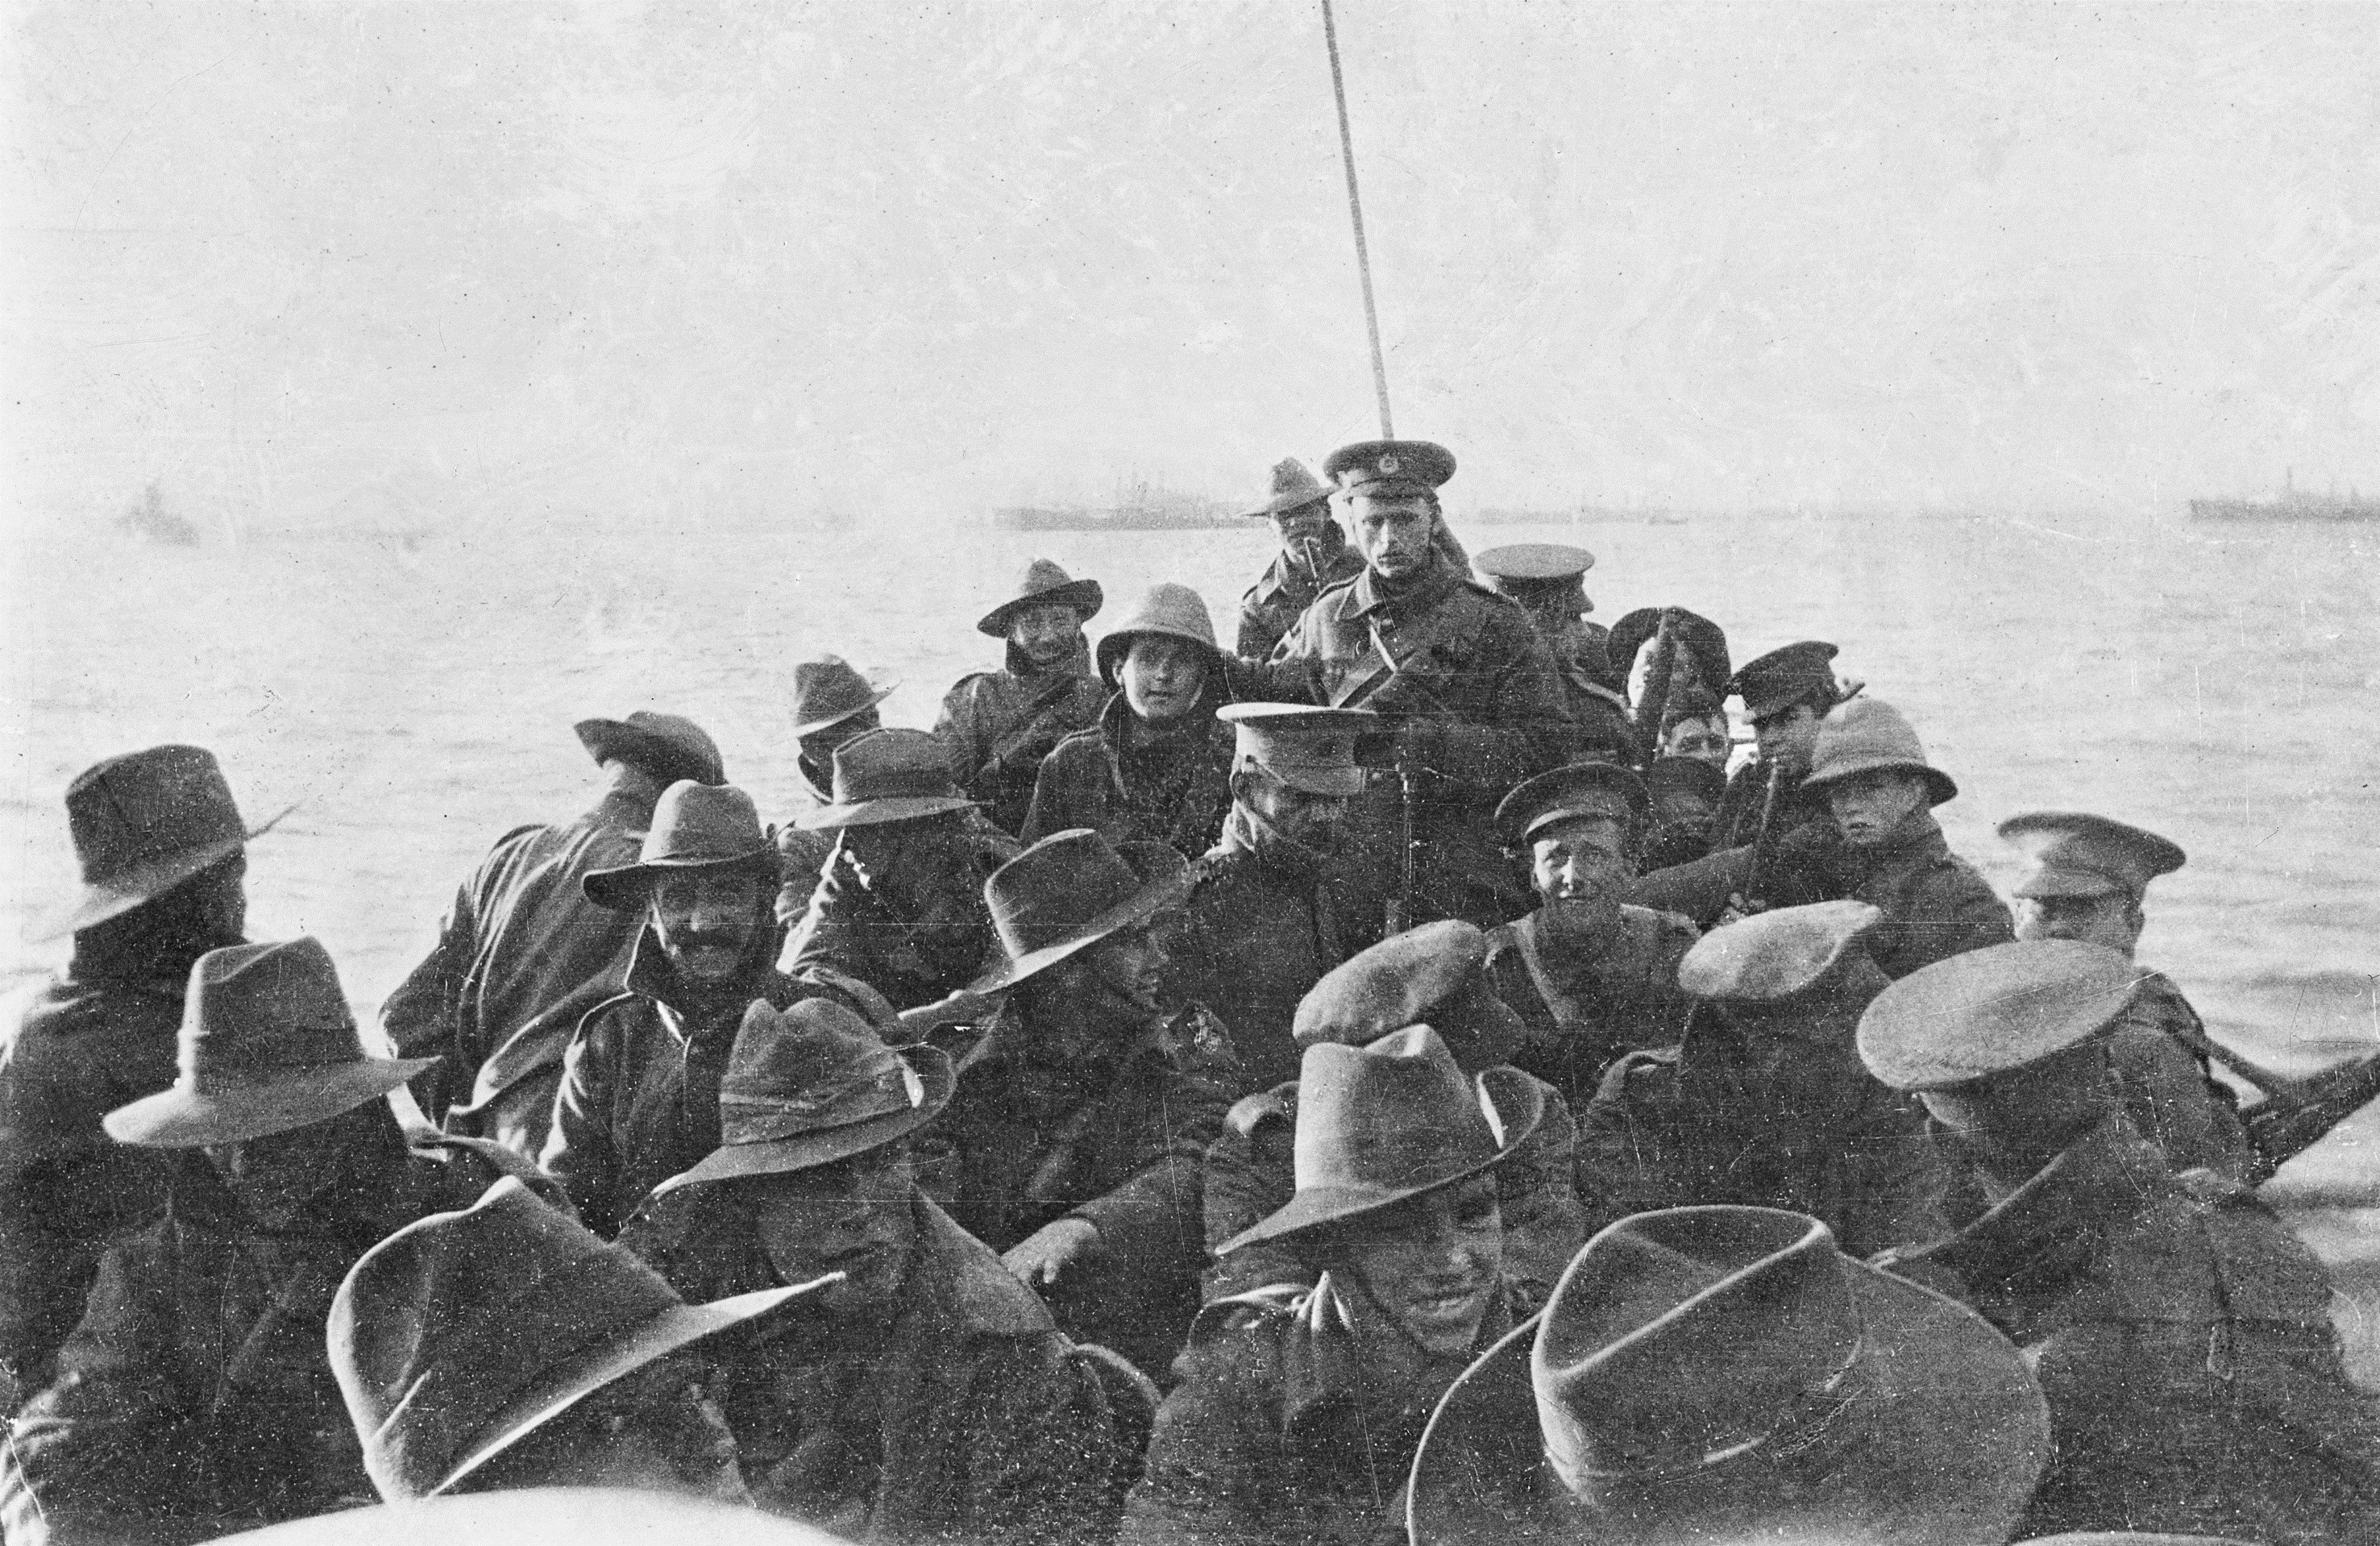
Australian troops land at Gallipoli: most of the landing crafts were simple rowboats, providing no defense to the men inside against fire coming from the beaches. The Allies hadn’t expected to land men under combat conditions
The plan was extremely appealing to the Allied governments. A quick victory, using few men, would not only knock the Turks out of the war and allow Russia to be easily resupplied, but might open up the “soft underbelly” of the Duel Alliance. Bulgaria and Greece would be sure to join the Entente and a Southern Front would take pressure off of Russian troops as well.
The first efforts were not as easy as they had appeared on paper.
For nearly a month, Anglo-French warships slowly made their way up the Straits, shelling Ottoman positions, and navigating around Turkish shells and mines. Small detachments of Royal Marines would land at Ottoman forts and dismantle whatever remained. But to the growing frustration of the Navy and Churchill, often these Ottoman positions would reappear within days. Even a large scale attempt to break the stalemate with 18 battleships didn’t achieve the desired result of increasing Allied control of the Straits. Worse, the Allies lost 4 ships to enemy fire and mines.

Otto Liman von Sanders – the head of the German Military Mission in Turkey, Sanders led the Ottoman effort at Gallipoli
Unwilling to suffer further naval losses without territorial gain, the Allies prepared to land ground troops on the Straits. Despite having only 78,000 men for the operation, the Allies believed these troops could quickly advance along the Gallipoli peninsula, clearing Ottoman opposition from the land to allow a faster advance on the sea. A combination of British, French, Australian and New Zealand troops (or ANZACs as the Australian/New Zealand men were known), would hit the beaches on April 25th, 1915 in the largest amphibious offensive of the entire Great War. So confident were the Allies of a quick victory that their troops were educated in various ways in which “Johnny Turk” might surrender.
The nearly two months long naval bombardment had destroyed any chance that “Johnny Turk” would be surprised by a landing in the Straits. By early April, the Ottoman Fifth Army had established itself in the Dardanelles, bringing 62,000 Turkish troops to the expected fight. The Fifth was easily the most prepared unit in the Ottoman Army as it was largely led by German officers, including the head of the Germany military advisory board, Gen. Otto Liman von Sanders. While von Sanders had the advantage of time, he also had the burden of trying to determine where exactly the landings would take place. Despite building roads, trenches, airfields and gun emplacements, von Sanders’ forces were scattered across the Straits, much to the displeasure of his Turkish subordinates. Regardless of where the Allies landed, the Turks would be ill-prepared to respond to the invasion with overwhelming force.
—

The ANZACs – the Australian and New Zealand Army Corps lost over 35,000 men combined at Gallipoli, defining the campaign especially for Australia, which contributing nearly 420,000 men in the Great War out of population of only 4.9 million
If the Turkish strategy conformed to Frederick the Great’s warning that “he who defends everything defends nothing,” the Allies were planning to press the attack everywhere and nowhere at once.
The Allied assault on Gallipoli on April 25th, 1915 hit a multitude of targets. The ANZACs landed to the north of the bulk of the invasion, intending to swoop across the peninsula and cut off the Turks rushing to hit the British and French troops further south. The British 29th Division hit 5 different beaches with troops to sow further chaos, as did the French who landed on the opposite side of the Straits. The Allied Navy even launched another operation deep into the Straits.
For as much planning as the Allies had done to try and keep the Turks confused, they had given little thought as how to get ashore safely, or what to do once their beachheads were secure.

Turkish Troops at Gallipoli – 315,500 Ottoman soldiers served at Gallipoli, tying down a much larger force with fewer losses
The modern perception of Gallipoli is of British troops on empty beaches, awaiting orders. Urban legends floated stories that British troops stopped for tea after reaching their initial objectives. And while a few of the landing zones for Allied troops contained limited to no Ottoman resistance, the reality of the first hours of Gallipoli rival anything experienced by Allied troops a generation later at Normandy.
Men came ashore in massive rowboats which offered no protection if the beaches they hit were defended. At one of the five beaches the British 29th Division landed at, Beach W, Turkish machine gunners were perched on the hills above and rained fire directly into the boats. Of the 200 men in the first wave, only 21 even reached shore alive. Among the 1,000 men assigned to Beach W, just 600 survived the first day.

Testing the Enemy – the Allies lost 252,000 men in the trenches of Gallipoli; a nearly year-long slog of a campaign that had been hoped to quickly knock the Ottoman Empire out of the war
The casualty rate was even worse on other beaches. Gallipoli’s steep cliffs, often coming right to the water’s edge, gave Allied troops little room to disembark. Barbed wire covered the shallow beachheads as Turkish artillery pounded the sands. At Beach V, where 1,012 Dublin and Munster Fusiliers were in the first wave, by the end of the initial invasion, only 11 men were unharmed.
But the real battle was at the ANZAC beachhead. If the ANZACs were successful in moving across the peninsula, the Turks at Gallipoli would entirely cut-off from reinforcement and most of the Turkish Fifth Army might be forced to surrender. The path to Constantinople would be practically undefended.
.jpg)
Mustafa Kemal Atatürk – the future “father of modern Turkey” – held Gallipoli amid the initial Allied invasion. He told his troops: “I don’t order you to fight, I order you to die.”
The ANZACs were pressing ashore with speed, overwhelming the Turkish defenders. The Turkish 19th Division, stationed at Gaba Tepe near the beach that would soon be renamed Anzac Cove for the battle, was running out of supplies. Led by Mustafa Kemal, who would later be known as Atatürk and the founder of the Republic of Turkey, the 19th Division received word from their 57th Infantry Regiment – the troops had run out of ammo. They had nothing left but their bayonets to fight the ANZACs streaming inland. Kemal knew the significance of the moment – there were no reserves to replace or relieve the 57th; if they fled, the path across Gallipoli would be wide open. He responded back to the 57th. “I do not order you to fight,” Kemal instructed the beleaguered men, “I order you to die.” Kemal explained his morbid orders. “In the time which passes until we die, other troops and commanders can come forward and take our places.”
The 57th Regiment fought to the death. The unit was completely destroyed. But the ANZACs were stopped. As was the Allied strategy.
—

French Troops Land at Gallipoli – while Gallipoli is largely remembered as a British (or Australian) campaign, 79,000 French troops also fought on the front
What had started as a quick, five-division operation designed to boot the Ottoman Empire out of the Central Powers, transformed into a massive 15 division operation with the goal of moving meters, not miles. 489,000 United Kingdom troops, supported by 79,000 French soldiers, threw themselves against the Turkish lines on the tiny peninsula month after month. Gallipoli swallowed up Turkish resources too. The 62,000 men Otto Liman von Sanders commanded now swelled to over 315,000.
British frustration with Gallipoli had boiled over into London’s politics. Prime Minister H. H. Asquith, who had led the Liberal government since 1908, found himself politically abandoned and forced to unite with the Conservatives rather than face a vote of no-confidence. Churchill became the scapegoat for the failings in Gallipoli, initially taking on a lower position in the joint Liberal-Conservative coalition cabinet before finally being forced out of power completely. For the next year, Churchill would spend the Great War as a forgotten infantry commander of the Royal Scots Fusiliers on the Western Front.

Churchill (right) at his Great War peak – First Lord of the Admiralty. Churchill received the lion’s share of the blame for Gallipoli, losing his post and role in the government. He would remain haunted by Gallipoli’s potential for years, saying “the terrible ifs accumulate.”
Despite Gallipoli nearly bringing down London’s government, yet another attempt was made to try and break the stalemate. Two British division would land at Sulva, 5 miles north of the ANZAC beachhead, trying to replicate the objective of the initial ANZAC landings without repeating the outcome.
The August 9, 1915 landings at Sulva went smoother than the ANZACs did more than four months earlier. If anything, the landings were too smooth. Expecting a fiercer fight, commander Lieutenant General Frederick Stopford held back his men in case the Turks launched a counterattack, instead of pressing forward as quickly as possible. Sulva descended into the same pattern as the rest of the Gallipoli operation – the Turks regrouped, halted the Allied advance, the Allies doubled-down in trying to accomplish their objective, resulting in the annihilation of some units. One unit, comprised of men from King George V’s Sandringham estate, thus earning the moniker, the “Sandringham Company,” was so completely destroyed that it entered into the realm of legend. Allied troops suggested the unit had, in a “Brigadoon” like fashion, simply disappeared into the mist.
—

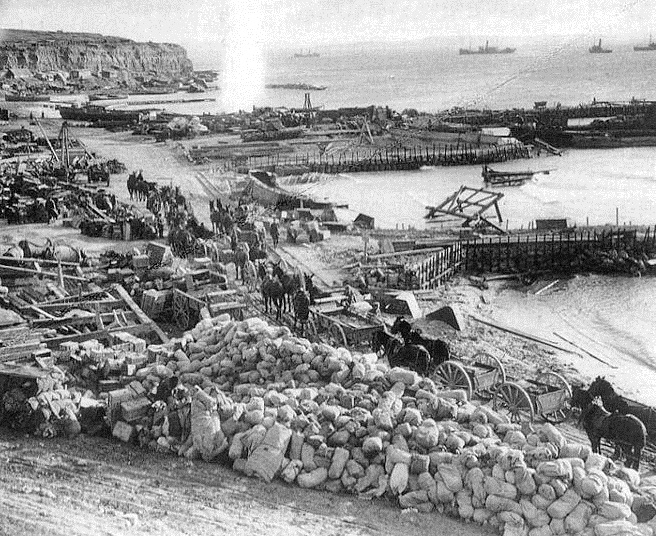
The Scramble Out of Asia – the evacuation of Gallipoli was perhaps the most successful part of the operation. But hundreds of mules and thousands of pieces of equipment were hastily left behind for the victorious Turks
By October of 1915, it was widely agreed among the Allied powers that Gallipoli was nothing sort of a disaster. The only thing that had gone somewhat to plan was, as expected, Bulgaria had joined the war….only on the side of the Central Powers. The Allies were on their way to losing nearly 252,000 men (nearly half from disease), and coupled with losses in the Middle East and the new Salonika Front in Greece, the men at Gallipoli were badly needed elsewhere.
For an operation that had gone nothing but wrong since the first Allied troops set foot ashore, the evacuation of Gallipoli was almost literally the only thing that went right.
Amid predictions that they would lose tens of thousands of troops in the process, the evacuation of the Sulva and ANZAC beaches went by practically undetected. Even as the Ottomans watched the southern beachheads closely, hoping to take the British by surprise and rush those fronts as troops left, the Allies managed to sneak away under the cover of dark with barely anyone noticing.
—

Crowded Retreat – the failure of Gallipoli cast a pale over amphibious operations for a generation. Military planners in WWII were stilled studying Gallipoli as late as Normandy, if only as a guide for what not to do
In the aftermath of the operation, Gallipoli became short-hand for both the incompetence of the Asquith government and the British obsession with tertiary fronts. The failure of Gallipoli coincided with another defeat at the hands of the Ottomans – this time at the besieged city of Kut, in Mesopotamia (modern Iraq). Nor did it help that the new Salonika Front was swallowing hundreds of thousands of Allied troops who largely sat in place (the Germans joked that Salonika was their largest POW camp).
Gallipoli also ruled out the Allies attempting to circumvent the German lines on the Western Front with an amphibious operation, despite amble beaches along the Belgian coast. Gallipoli had again shown the technological limitations of the era – the coordination of artillery and troops movements in offensive operations could not match the defensive capabilities of men in prepared trenches. There had been occasions at Gallipoli that troops had exceeded their original orders, capturing more territory than expected. But lacking the ability to communicate with command in real time, most regimental commanders opted to consolidate their gains rather than press their advantage. In Churchill’s words, there too many “terrible if’s” missed at Gallipoli.
Lastly, and perhaps most importantly for the remainder of the conflict, Gallipoli gave the Ottomans confidence that their troops could beat the Allies, at least when commanded by German generals. By the conclusion of Gallipoli, the Ottomans were beginning to prepare another offensive against the Suez Canal. There would be no quick operations to knock any of the powers out of the war.

Pingback: Mob Mentality | Shot in the Dark
Pingback: The Last Million Men | Shot in the Dark
Pingback: Beach Party | Shot in the Dark
Pingback: “Jerusalem Before Christmas” | Shot in the Dark
Pingback: On the Line | Shot in the Dark